 Save
Save There's something almost magical about the smell of donuts frying on a lazy Sunday morning, that golden aroma that seems to pull everyone into the kitchen whether they planned to be there or not. I discovered these glazed yeast donuts quite by accident, really—a failed attempt at croissants that somehow transformed into something far better. The first batch came out impossibly light and airy, nothing like the dense cake donuts I'd made before, and my partner couldn't stop eating them straight off the cooling rack. Now they're the one thing I make when I want to feel like I've done something special, even though the process is more forgiving than you'd think.
I'll never forget the time I made these for my neighbor who'd just moved in, and she stood on the porch eating one while we talked for forty minutes straight, somehow managing to ask for the recipe with her mouth full of glaze. That moment taught me that good food doesn't need to be complicated or take all day—it just needs to taste like someone cared enough to do it right. The yeast dough gets forgiving once you understand it, and the reward is absolutely worth the small amount of planning involved.
Ingredients
- All-purpose flour (3 1/2 cups): The foundation of structure; I always measure by weight if I can because it keeps the dough from becoming too dense or too sticky.
- Whole milk (1 cup, warmed): Warmth matters here—too hot and you'll kill the yeast, too cool and it won't activate; aim for the temperature of a comfortable bath.
- Unsalted butter (1/4 cup, melted): This is what makes them tender and gives them that rich flavor that separates yeast donuts from the basic kind.
- Granulated sugar (1/4 cup): Feeds the yeast and sweetens the dough just enough that the glaze doesn't feel like overkill.
- Active dry yeast (2 1/4 tsp): Don't skip the bloom step—those 5 minutes with warm milk are where the magic starts and you'll see it foam up like a tiny edible volcano.
- Large eggs (2, room temperature): Room temperature eggs incorporate more evenly and help create that incredibly light crumb structure.
- Fine salt (1/2 tsp): Balances sweetness and strengthens the gluten network, so don't leave it out even though it seems small.
- Neutral oil (2 quarts for frying): I use canola because it has a high smoke point and doesn't add competing flavors; keep a thermometer handy because temperature is everything here.
- Powdered sugar (2 cups, sifted): Sifting takes thirty seconds and completely changes the texture of your glaze from lumpy to silky.
- Vanilla extract (1 tsp, pure): Pure vanilla tastes noticeably better than imitation, and this isn't the place to economize.
Tired of Takeout? 🥡
Get 10 meals you can make faster than delivery arrives. Seriously.
One email. No spam. Unsubscribe anytime.
Instructions
- Wake up the yeast:
- Combine warm milk and yeast in a small bowl and let it sit for 5 minutes until it's foamy and smells alive and yeasty. This isn't just a step—it's your proof that everything's going to work.
- Build your dry base:
- Whisk flour, sugar, and salt together in a large bowl; this distributes everything evenly so you won't get pockets of saltiness or sweetness later.
- Bring it together:
- Pour the yeast mixture, melted butter, and eggs into the dry ingredients and mix until a shaggy, sticky dough forms. It'll look messy and that's exactly right.
- Develop the dough:
- Knead on medium speed for 5 to 7 minutes (or by hand, though your arms will know it) until the dough becomes smooth, elastic, and springs back when you poke it. This is where gluten develops and your donuts get their structure.
- Let it grow:
- Transfer the dough to a greased bowl, cover it loosely with plastic wrap or a damp towel, and set it in a warm spot for 1 to 1.5 hours until it's clearly doubled. A cool kitchen takes longer; a warm one moves faster—use your eyes, not just the clock.
- Shape and cut:
- Roll out to 1/2-inch thickness on a lightly floured surface and cut out donuts using a 3-inch donut cutter, pressing straight down without twisting (twisting seals the edges and they won't rise as much). Keep the holes—they're mini donuts and guests love them.
- Final rise:
- Arrange donuts and holes on parchment paper, cover them, and let them puff up for 30 to 45 minutes; they should look noticeably puffy but not so much that they're about to burst.
- Heat your oil:
- Bring your oil to 350°F in a deep pot or fryer; use a thermometer because eyeballing this leads to either raw dough or burnt exteriors. I learned that lesson the hard way.
- Fry with confidence:
- Working in batches so you don't crowd the pan, gently place donuts into hot oil and fry for about 1 to 1.5 minutes per side until they're deep golden brown. They'll flip naturally when the first side is done; use a slotted spoon to transfer them to a paper towel-lined rack to cool slightly.
- Make the glaze:
- Whisk together sifted powdered sugar, milk, vanilla, and salt until you have a smooth, pourable consistency. If it's too thick, add milk a teaspoon at a time; too thin, add more sugar.
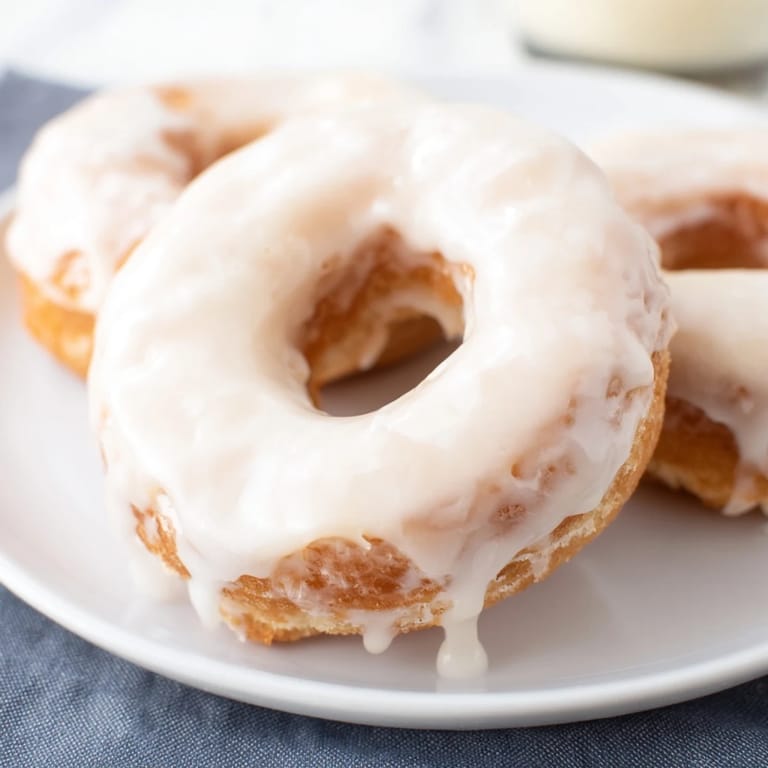
- Coat and set:
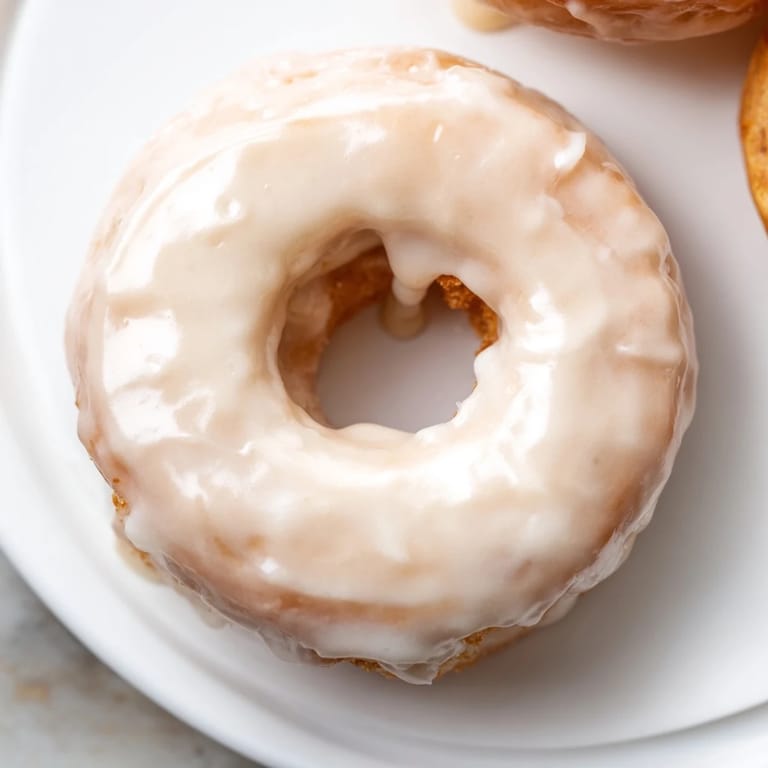
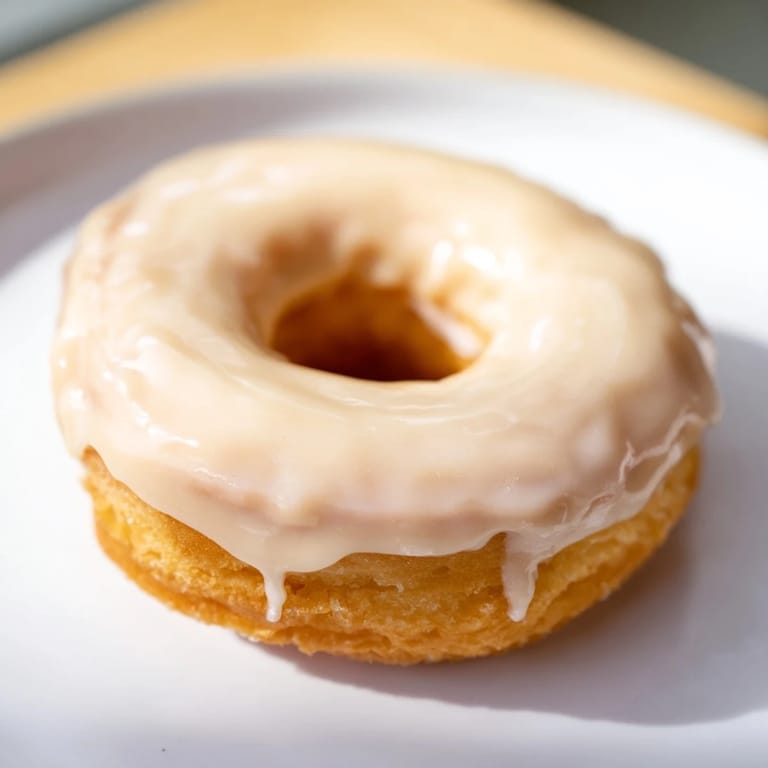
- While the donuts are still warm, dip each one into the glaze, letting excess drip back into the bowl, then place them back on the rack. The warm donuts will help the glaze set into a light shell that's nothing like hardened frosting—it's more like a delicate crust.
 Save
Save I remember my daughter helping me cut out the donuts with the donut cutter, her concentration so serious as she pressed straight down, and how proud she was when they turned out perfectly. That's when I realized these donuts aren't really about showing off in the kitchen—they're about creating the kind of food that makes people feel cared for and brings them back for more.
Troubleshooting Your Rise
If your first rise doesn't double after 1.5 hours, your kitchen might be too cold; turn on the oven light and close the door, or drape the bowl in a heating pad set to low. If the dough rises too fast and looks overproven before you can cut it, you might have used yeast that's older than you thought, or the room is warmer than expected—trust your eyes over the timer. A properly risen dough should look pillowy and puffy, indenting slightly when you gently press a finger into it.
Flavor Variations Worth Trying
The vanilla glaze is perfect as-is, but once you've made these a few times and feel confident, small additions elevate them in interesting ways. A pinch of nutmeg in the dough itself adds a subtle warmth that people notice but can't quite name, while a touch of almond extract or lemon zest in the glaze creates something more sophisticated without trying too hard. I've also dusted the warm glazed donuts with cinnamon sugar before the glaze set, which creates a texture that's fun and a little nostalgic.
Making Ahead and Storage
These donuts are best the day they're made, but they hold up better than you might think if you plan properly. You can prepare the dough in the evening, let it rise overnight in the refrigerator, bring it to room temperature in the morning, cut and fry just before eating, and have fresh donuts for breakfast without the early wake-up. Leftovers keep in an airtight container for a day or two, though they firm up slightly—a quick 20 seconds in the microwave brings back that tender feeling, and honestly, a day-old donut with coffee is still pretty wonderful.
- The dough can refrigerate for up to 8 hours and actually develops better flavor during a slow, cold rise.
- You can freeze the fried donuts unfrosted and glaze them fresh when you want to eat them, which is a small hack that feels like cheating but works.
- Store glazed donuts at room temperature rather than refrigerating them, as cold temperatures make the glaze firm up in a less pleasant way.
 Save
Save There's something quietly satisfying about the moment when a homemade donut comes together—when you bite into that tender, yielding crumb and taste the simple, honest vanilla glaze. Make these when you want to remind yourself and the people around you that good things don't have to be complicated to be special.
Recipe FAQs
- → How long should the dough rise?
The dough should rise about 1 to 1.5 hours until doubled in size, then again for 30 to 45 minutes after cutting into shapes for a light texture.
- → What oil is best for frying the donuts?
Neutral oils like canola or vegetable oil work well, as they allow the donuts to crisp without affecting the flavor.
- → Can I add flavor variations to the glaze?
Yes, almond extract or citrus zest can be added to the glaze for a different flavor profile.
- → How do I know when the donuts are cooked?
Fry until golden brown on each side, about 1 to 1.5 minutes per side. The exterior should be crisp while the inside remains tender.
- → What tools are essential for making these donuts?
A stand mixer or large bowl and spoon, rolling pin, donut cutters, deep fryer or heavy pot, slotted spoon, wire rack, and parchment paper are all helpful.