 Save
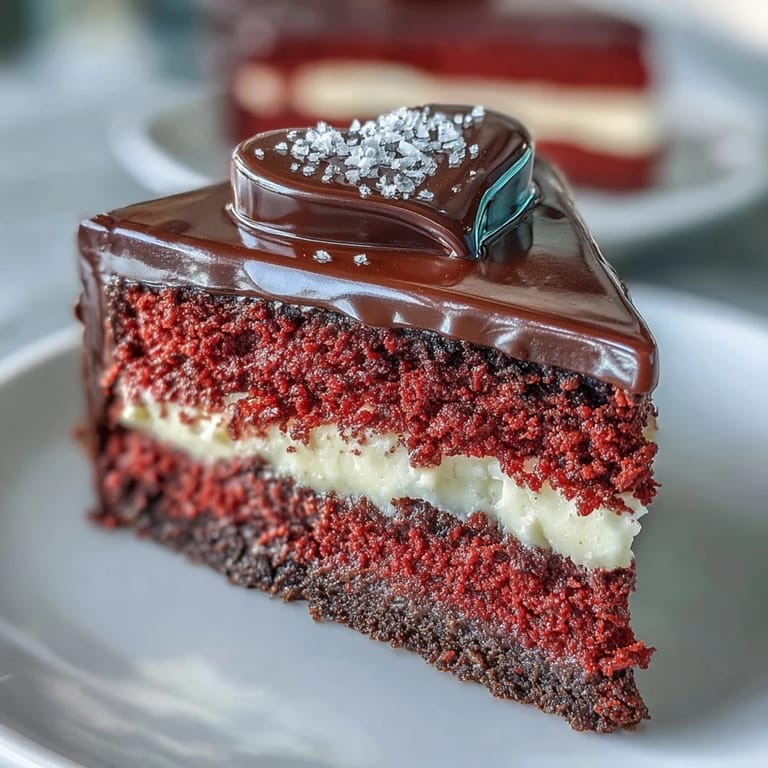
Save My daughter's birthday was coming up, and she'd been sketching Betty Boop all over her notebook margins for weeks. I wanted to surprise her with something that felt as bold and joyful as her drawings, so I sketched a heart-shaped Betty silhouette in chocolate and pressed it into a bright red cake. The moment she saw it, her eyes went wide, and she ran around showing everyone the cake before we even sang Happy Birthday. That little chocolate cutout turned a simple layer cake into something she still brings up years later.
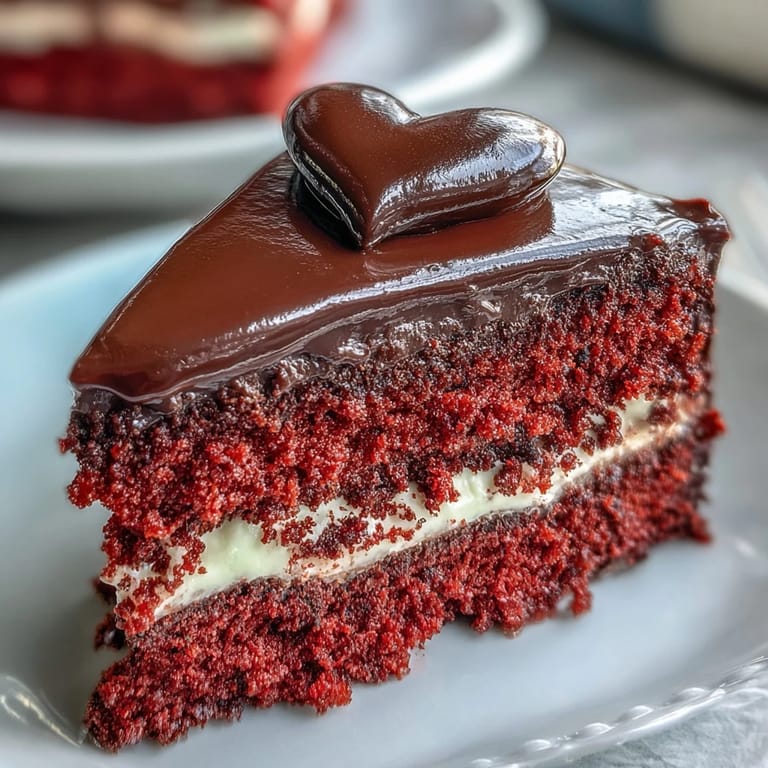
I made this cake for a friend's vintage-themed brunch, and it became the centerpiece before anyone even tasted it. The red was so vivid against the white frosting, and when I placed the chocolate Betty on top, someone gasped and pulled out their phone. We spent ten minutes taking photos from every angle, laughing about how a cartoon character could steal the show. When we finally cut into it, the soft crumb and tangy frosting made everyone go quiet for a second, and then the compliments started rolling in.
Ingredients
- Cake flour: Sifted cake flour gives you a finer, more delicate crumb than all-purpose, and it's worth seeking out for layer cakes like this.
- Natural unsweetened cocoa powder: Just a touch deepens the red color and adds a subtle richness without making the cake taste like chocolate.
- Red gel food coloring: Gel is much more concentrated than liquid, so you get a bold red without thinning your batter.
- Buttermilk: The acidity reacts with baking soda to create lift and tenderness, and it keeps the cake moist for days.
- White vinegar: A small amount mixed with baking soda creates a gentle foam that aerates the batter and lightens the crumb.
- Cream cheese: Make sure it's fully softened so your frosting stays smooth and lump-free.
- Dark chocolate or candy melts: Dark chocolate sets firm and peels easily from parchment, making it perfect for delicate silhouettes.
Tired of Takeout? 🥡
Get 10 meals you can make faster than delivery arrives. Seriously.
One email. No spam. Unsubscribe anytime.
Instructions
- Prep the Pans:
- Preheat your oven to 350°F and grease two heart-shaped pans, then line the bottoms with parchment so the cakes release cleanly. This step saves you from broken hearts later.
- Mix the Dry Ingredients:
- Whisk together the cake flour, cocoa powder, baking powder, baking soda, and salt in a medium bowl. Set it aside while you work on the butter and sugar.
- Cream the Butter and Sugar:
- Beat the butter for a minute until it's creamy, then add the sugar gradually and keep beating for 2 to 3 minutes until the mixture is light and fluffy. This step traps air and gives you a tender crumb.
- Add the Eggs:
- Add the eggs one at a time on low speed, scraping down the bowl after each addition. Don't rush this, it keeps the batter smooth and emulsified.
- Color the Batter:
- Stir in the red gel food coloring, vanilla extract, and white vinegar until the batter is evenly colored and vibrant. The color will deepen slightly as it bakes.
- Alternate Dry and Wet:
- With the mixer on low, add one-third of the dry ingredients, then half the buttermilk, mixing just until incorporated. Repeat with another third of dry, the remaining buttermilk, and finish with the last third of dry ingredients to avoid overmixing.
- Activate the Baking Soda:
- Combine 1 teaspoon vinegar with baking soda in a small cup, then gently fold the foaming mixture into the batter. This creates a light, airy crumb.
- Bake the Cakes:
- Divide the batter evenly between the pans and smooth the tops with an offset spatula. Bake for 25 to 30 minutes, or until a toothpick comes out clean.
- Cool Completely:
- Let the cakes cool in the pans for 10 minutes, then invert onto wire racks and remove the parchment. Cool them completely before frosting, or the frosting will melt and slide.
- Make the Frosting:
- Beat the cream cheese and butter together for 2 minutes until smooth, then gradually add the powdered sugar, salt, and vanilla. Keep it covered in the fridge until you're ready to frost.
- Assemble the Layers:
- Level the cake domes if needed, then place one layer on a cake board. Pipe or spread about three-quarters of a cup of frosting over the top, add the second layer, and press gently.
- Crumb Coat and Chill:
- Apply a thin crumb coat of frosting over the entire cake and refrigerate for 10 minutes. Then add a final smooth layer of frosting, creating swirls or leaving it smooth as you like.
- Create the Silhouette:
- Place your printed Betty Boop stencil under parchment paper, then pipe or brush melted dark chocolate over the outline. Let it set at room temperature or in the fridge for 10 minutes.
- Add the Decoration:
- Carefully peel the chocolate silhouette from the parchment and lift it onto the center of the cake. Press gently so it adheres to the frosting without cracking.
- Final Touches:
- Decorate the edges with frosting rosettes, edible glitter, or red sugar pearls. Chill the cake for 30 minutes before serving, and slice with a warm, clean knife for neat hearts.
 Save
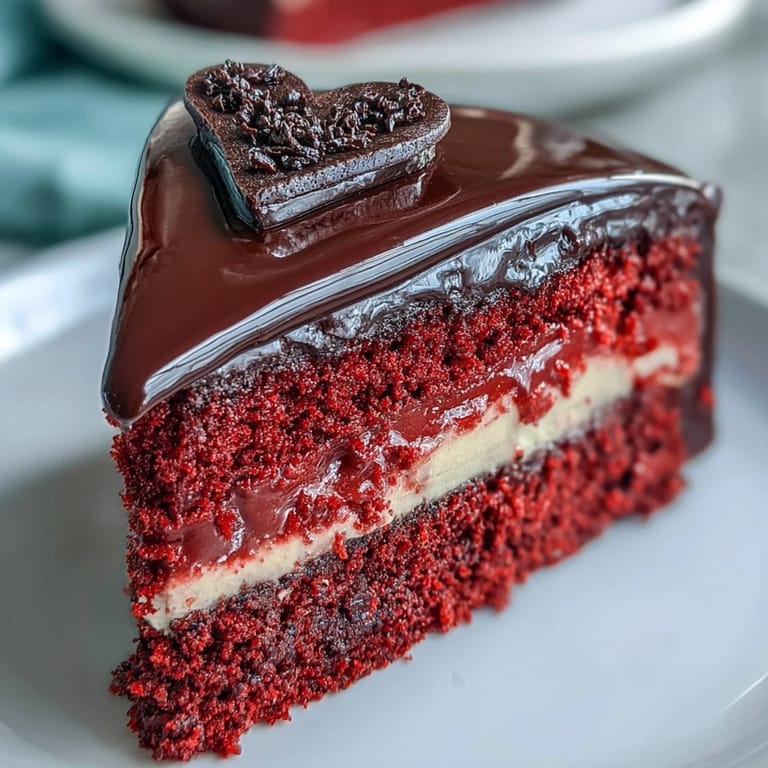
Save The first time I made this cake, my niece helped me pipe the chocolate silhouette, and we laughed when Betty's face came out a little lopsided. We pressed it onto the cake anyway, and it became the best part of the day, a reminder that homemade doesn't have to be perfect to be memorable. She still asks me to make the lopsided Betty cake every time she visits.
Choosing Your Chocolate
Dark chocolate sets firm and peels cleanly from parchment, making it ideal for delicate silhouettes. I've also used candy melts dyed black with oil-based coloring for a brighter contrast against the red frosting. If you're new to chocolate work, candy melts are more forgiving because they harden quickly and don't require tempering. Either way, make sure your chocolate is fully melted and smooth before piping, or you'll get clumps and uneven lines.
Getting the Red Just Right
The first time I used liquid food coloring, the batter turned pink instead of red, and I had to add so much that it thinned out the cake. Gel coloring is concentrated, so two tablespoons give you a bold, vibrant red without changing the texture. The color will deepen slightly as the cake bakes, so don't panic if the raw batter looks a little bright. If you want a deeper red, add an extra teaspoon of gel, but avoid going overboard or it can taste slightly bitter.
Storing and Serving
This cake stays moist in the fridge for up to four days, covered loosely with plastic wrap or in a cake dome. The cream cheese frosting needs to be refrigerated, but bring the cake to room temperature for about 30 minutes before serving so the flavors come through. If you're making it ahead, bake the cake layers a day in advance, wrap them tightly in plastic, and frost the day of your event. The chocolate silhouette can be made up to a week ahead and stored in an airtight container at room temperature.
- Slice with a warm knife wiped clean between cuts for neat, professional-looking hearts.
- Garnish individual slices with fresh raspberries or a dusting of powdered sugar for a pretty presentation.
- Leftover frosting can be piped onto cupcakes or spread between graham crackers for a quick treat.
 Save
Save Every time I make this cake, I think about how something as simple as a chocolate cutout can turn a dessert into a conversation starter. It's the kind of recipe that makes people smile before they even take a bite.
Recipe FAQs
- → What makes the red crumb so soft and moist?
The buttermilk and vinegar combination creates a tender crumb by activating the baking soda, while room-temperature ingredients emulsify properly for even texture. The careful mixing method—alternating dry and wet ingredients—prevents overdevelopment of gluten, keeping each bite incredibly soft.
- → Can I make the chocolate silhouette ahead of time?
Absolutely. The dark chocolate silhouette can be prepared days in advance and stored between parchment paper in an airtight container at room temperature. Keep away from heat sources and humidity to prevent blooming or softening before you're ready to place it on the finished cake.
- → Why use gel food coloring instead of liquid?
Gel coloring provides intense red hue without adding excess liquid that could alter the batter's chemistry and texture. Liquid food coloring would throw off the carefully balanced moisture ratios, potentially affecting the rise and final crumb structure of the heart-shaped layers.
- → How do I get clean slices through the heart shape?
Use a warm, clean knife—dip it in hot water, wipe dry, and slice with gentle pressure. The heat cuts through the cream cheese frosting smoothly without dragging, while the sharp blade preserves the heart shape. Wipe and reheat the knife between slices for best results.
- → Can I substitute the dark chocolate silhouette?
You can use white chocolate colored with oil-based black coloring for a brighter contrast, or create the silhouette from fondant for a different texture. Some bakers prefer modeling chocolate for easier handling. Just ensure whatever medium you choose sets firmly enough to lift cleanly from the parchment.
- → What's the purpose of the crumb coat?
The crumb coat—those thin initial layers of frosting—traps loose crumbs and creates a smooth foundation for the final coat. Chilling between coats ensures the frosting sets firm, preventing the red cake particles from marring the pristine white exterior of your finished creation.